
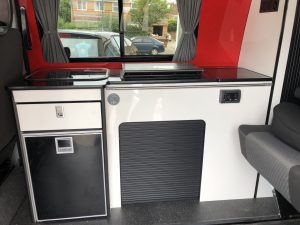
We decided to build the second unit so we could install them both together, the second unit assembles very much the same as the first, however the second unit has the hob and the sink in it. The hole for the hob is already cut out, but the hole for the sink is down to you.
Smev who supplied the sink, don’t supply a template, just drawing and I would advise that this is marked out on and cut out of a thin piece of ply, as there isn’t a lot of leeway for this to be fitted.
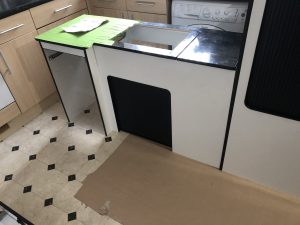
Lots of masking tape, scribbled out lines and pilot holes got ours in the right place, and once the hole is cut, there is not a lot of wood left. We fitted the hob and the sink, while the worktop was loose and then screwed it down.
The rear unit has been scribed to fit the contours of the van, and it fits really well against the side and back.
We held this in place with ‘L’ brackets screws into the vans metalwork and modesty blocks screwed into the floor. The last thing we want is this moving in the event of an accident. The front furniture was fixed in the same way, and then fixed to the rear with modesty blocks.
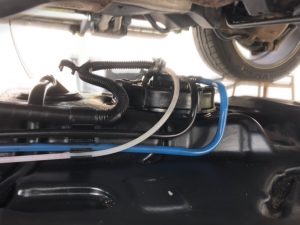
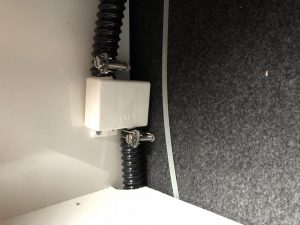
Once we had the units in place, it was time to start connecting up the appliances, the hob needed a fuel supply and a flue connected. The flue has two corrugated aluminium tubes, one for the incoming air supply and one for the exhaust, this meant drilling two 40mm holes thorough the floor of the van.

We marked out where we would like the holes to be, and drilled through the centre of one with a small pilot drill, annoyingly this came out under the van in a box section part of the cill, so we had to move the holes away from the side of the van.

Once we had these drilled, we fixed the pipes to the cupboard sides with ‘P’ clips, the exhaust pipe is wrapped in a heat resistant insulation. A trim plate covers the holes in the floor, as they have to be bigger than the pipe to give some insulation from the hot exhaust pipe.
Underneath we then had to fix the Inlet/Exhaust head, it has to be fitted at least 300mm in front of the rear wheel and at least 300mm behind any opening window, this doesn’t leave a lot of room, but luckily the underneath of the van at this point was ideal for fixing to.

Luckily this is quite well hidden by our side bars, as they are quite ugly and put some people off.
Next up is the fuel pipe, this has to be connected to the vehicle fuel tank, which means another hole in the floor for the fuel pipe to pass through.
The fuel tank has to be removed in order to fit the new pickup pipe, and this is best done when the tank is nearly empty to make it easier to manoeuvre. Once the tank is removed you have to remove the fuel sender unit.

There is a special tool to remove the sender unit, which is held in by a locking ring, but we had the next best thing which is a large hammer and a piece of wood.

In order to fit the new pickup pipe we had to drill a small hole through the top of the unit, in order to stop plastic swarf going into all the wrong places we wrapped the rest of the unit in a cloth.
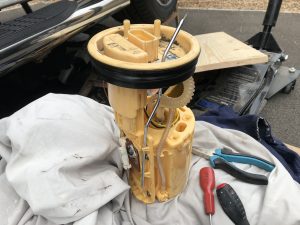
The new pickup sits about an inch up from the bottom of the tank to stop you using all the fuel through the hob. Reassembly as they say is the reverse of removal.
There is a spare row of clips on the tank that the new pipe can neatly clip onto.
Next we need to connect up the sink, this requires another two holes in the floor of the van, one for the water inlet and one for the waste outlet. The water is drawn up from the tank by a self priming pump, which is triggered by a microswitch on the tap.
We fixed the pump inside the cupboard under the hob, it has rubber mounts to reduce the noise and vibration when it is running.

In order to protect the microswitch on the tap, we installed a relay, so if anything goes wrong with the pump it wont damage the tap.
We fitted a waste trap to the outlet pipe, although next time, I will just put a loop in the pipe as we had a few issues with leaks on the entry side of the trap.
The waste pipe exits under the van, in a special socket that we can connect a pipe to.

Campsites dont like the waste water going straight on the ground, so we have a grey water tank that we can empty when necessary.

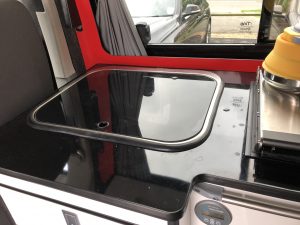
So with the water pump primed, waste tank connected it was time to test the sink.

It works, so now for the real test.
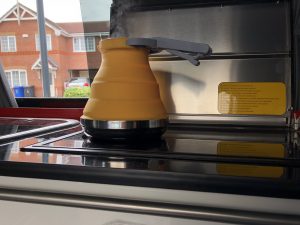
A boiling kettle for our first cup of coffee made in the van, when the sink is not in use, the lid folds down for some extra worktop space.
The last appliance to be fitted is the fridge, this is quite easy to fit, two wires and four screws. We bought a compressor type fridge, very similar to the ones we have at home but more rugged to withstand the day to driving over our bumpy roads and campsites. Like the hob they are designed to work when sat on a slight angle.
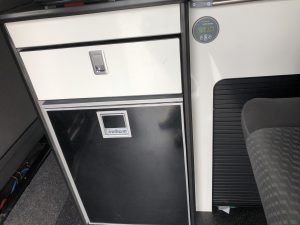
The fridge has a capacity for 49 litres, which isn’t massive, but it can take 6, 2 litre bottles, and it has a small ice compartment.
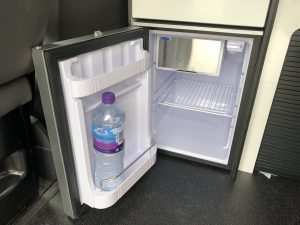
Part of the shelf folds up and the other three bottles stand up next to the ice box, We think this will be big enough although we may end up getting a small compressor coolbox to compliment it.
So that is most of the furniture in, still left to do is an LED light shelf over the sink and hob, another light over the back of the bed and we need to make a storage unit to go under the bed.
We are nearly there.