
In order to have a nice solid base for the furniture to sit on, and the floor not to flex when we walk on it, we needed to ditch the 9mm ply floor, that came with the van and replace it with a nice 12mm ply one.
We have had a 10′ x 5′ sheet of 12mm ply taking up all the space in the garage for a few weeks, just waiting for a dry couple of says to fit it.
Ideally we wanted the floor to be all in one piece, however the five foot wide sheet we had, isn’t quite wide enough, we will have an infill piece about five inches wide, but as this will be under the units down the right hand side, I don’t think this will present any problems.
The first job is to get the new sheet of ply up on some trestles and then mark out the shape using the old floor as a template, make sure that the old floor is how you want the new floor to be, especially if your van had a bulkhead, as you may want to elongate some of the corners.
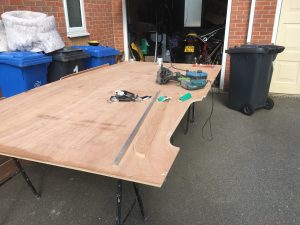
The old floor was positioned on the sheet of ply and drawn around, allowing any extra where required, then we carefully cut around the shape with a jigsaw. The slots for the bed rails were rough cut and then after trial fitting, and marking, we cleaned these up with a router to give a nice straight edge.

We had several goes at this, taking a bit more out each time, until we had a nice snug fit, then we remembered we had not allowed room for the rubber trim to slide down the sides, of the rails, so out it came and another 4mm was taken off each side of the slot.
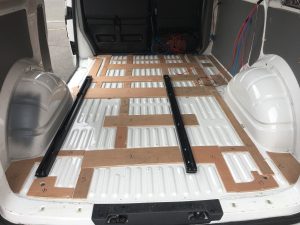
The van floor has ribs pressed into it to add strength, in order to maximise the rigidity of the new floor, we cut the old 9mm ply floor into battens and glued these in between the ribs. We cut about 40 of these parts, each one was numbered, and the van floor was written on, to make sure it went in the right place.
After cleaning and degreasing the floor we stuck all of the pieces of ply down with tiger seal, which is a very strong flexible adhesive, while we did this, we primed all the holes that had been used to secure the old floor and filled them with the adhesive.
We placed the new ply floor on top of these and weighted it down with bricks to ensure the base was nice and flat and then left it overnight for the adhesive to fully cure.
We removed the new floor ready to install yet more sound deadening, a piece was cut to fit in between every batten.
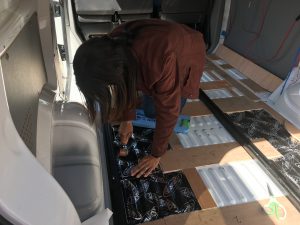
Luckily, the thickness of the dynomat extreme we used, made the ribs in the floor level with ply battens we had glued down.

We refitted the new ply floor and temporarily screwed it down to the new battens, the floor will be in and out a few times, before it is permanently fixed down and covered with some Altro heavy duty vinyl flooring.

This has made quite a big difference to the quietness inside the van, and hopefully when we sound deaden the front doors and the cab floor, it will improve it even further.