
Charge Up
In order to power the various items on the van without flattening the starter battery, we need to install a leisure battery, normal car batteries are designed to supply large amounts of current in short bursts to start the engine. Leisure batteries are the opposite, they are designed to supply small amounts of current for longer periods.
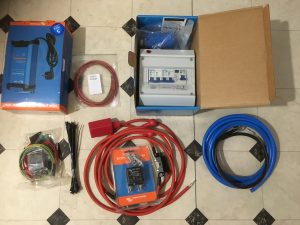
I bought the electrical components from Martyn at https://www.travelvolts.net, he is very knowledgable in all things vehicle electrical.
The leisure battery is charged while the vehicle engine is running, using a special relay that monitors the voltage in the starter battery, and then diverts the charge to the leisure battery when it has sufficient charge.
When we get onto site we will be able to connect up to a 230v supply, this will power an intelligent battery charger to charge the leisure battery while we are stationary and also supply 230v power for life’s little luxuries, such as a hairdryer (not for me), straighteners (again not for me) and a microwave.
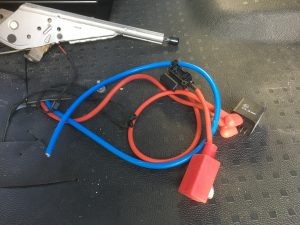
First of all I installed the split charge cable, Martyn’s kits come with e cables already terminated and excellent instructions.The cable is fed through the bulkhead through an existing grommet and connected to the positive side of the battery.
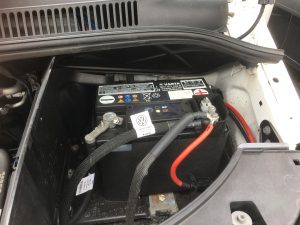
This then neatly fits into the existing clips, there is a large fuse in this section which is left out until the battery is fitted. Run the cable along the inside behind the dashboard, tying up with cable ties, take it to the centre of the cab ready for feeding down through the ready made conduit between the seats.
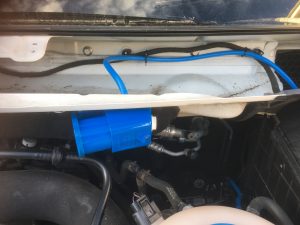
In order to connect up to the 230v on site we need to add a socket, which we can plug the lead into, a tried and tested place on the T5 is under the bonnet, this saves scrabbling around under the van in the dark, or even worse the rain.
Start by removing the windscreen wipers, then the plastic trim underneath, my wipers gave me a good half hours worth of fight before they gave in and came off the spindles.
I positioned the connector in the suggested position, drilled though the metal panel, demurred the hole fully and then painted the hole with a rust preventative paint. I gave this time to dry (while I had a coffee) and then inserted a grommet into the hole and fed the cable through.
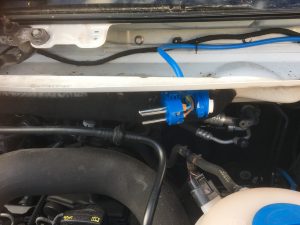
I terminated this as per the markings on the connector and then put the cover on and fed the the cable though another existing grommet in the bulkhead.

I cable tied this to an existing part of the loom to keep it tidy.
I then cable tied this cable alongside the split charging cable from earlier behind the dashboard ready to feed down through the conduit.
I took the drivers seat out so I could get my hand under the rubber mat to feel the cable coming through, but if I were to do it again I would take out the passenger seat as well, as I lost a fair bit of skin of the back of my hand, forcing it under the rubber mat.
The conduit between the two seats seemed to have enough room to feed the two cables through, but it took me ages to get them through, in the end I pushed a piece of household twin & earth through and then taped them to the end and pulled it back thorugh.

I would suggest that you tie a piece of string to the cable as you feed it though to help pull any more through, the cable then follows some original wiring and comes up though a ready made hole under the drivers seat ready to connect to the leisure battery and the consumer unit.
Quieten Down
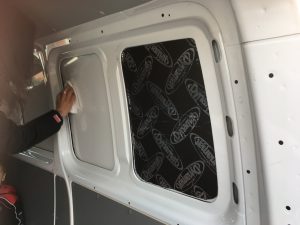
Having removed all of the ply panels from the van, the first job we have to do is to do some sound deadening, there are several stages to this, the first behind to stop the side panels of the van resonating (drumming) as we drive along. There are a few products on the market for this, I decide to use Dynomat Extreme as it had some good reviews, I found that amazon was just about the cheapest by a few pence.
We covered the inside of every panel that isn’t going to have a window fitted, first the panel was wiped down using panel wipe to remove any grease or grime. Dynomat can be cut quite easily using a Stanley knife, but it requires a fair bit of patience to fit. It is quite stiff up until you remove the flimsy backing paper, then it goes very floppy, and if it sticks to itself, you will never get it apart.
Once again my glamorous assistant stepped in to install the Dynomat, once you have stuck it on, you then go over the surface with a roller to iron out any creases and ensure good adhesion.
This process took us a couple of weekends, but the difference is night and day, tap on the outside of panel that has been deadened gives a dull thud, compared to a much louder sound on an undeadened panel.


Some of the edges are quite sharp as we both found out, so I suggest that protective gloves are worn.

Next time, more wiring.